 DigitByte Software for Windows, Mac, iPhone, iPad, iPod – free download
How to convert image to EPS online easy and fast?
If you have some image files, each file is not very large, you do not want to download anything, However, you want to convert image to EPS format online, this was previously impossible task, but now, you can convert your image file to EPS format with a online converter (online-convert.com), it is very convenient.
Here are the steps online EPS converter:
1. copy and paste online-convert.com into your browser address bar to access the site
On the home page, in the “image converter” section, click the drop-down menu, select “Convert to EPS”, click “Go” button

2. At this time, you came to the “Convert an image to the EPS format” page, click on “Choose File”, select an image format file from your local hard disk, it is you want to convert file formats, or enter a URL of your image, for example, a image url on YouTube, in the “Option settings” option, you can set various parameters,change size, color, enhance. The following is the screenshot.

3. Well, after complete settings, click “Convert file” button to immediately display the file being processed, when the upload task is complete, another window will automatically perform the conversion task.

4. After conversion, a downloading dialog box pops up automatically (I use Google chrome browser), click “download” to download the file to your local hard disk, if your browser does not pop-up downloading dialog box, you can click on the direct download link.

Done! the above steps are the online conversion process about image to EPS.
If you like this article, please Favorite it, thank you for your support
You may also be interested in the following:
Batch Photo Resizer is an easy-to-use batch tool to resize, convert, rotate, flip, rename, sort photos and add text or watermark. It supports many picture formats such as JPG/JPEG, BMP, GIF, PNG, ICO, TIF, EXIF, WMF, EMF, etc with batch mode. The output photos’ size and quality can be adjusted. It can sort images by the file time or name. It can search photos in a folder, and supports to drag and drop files.
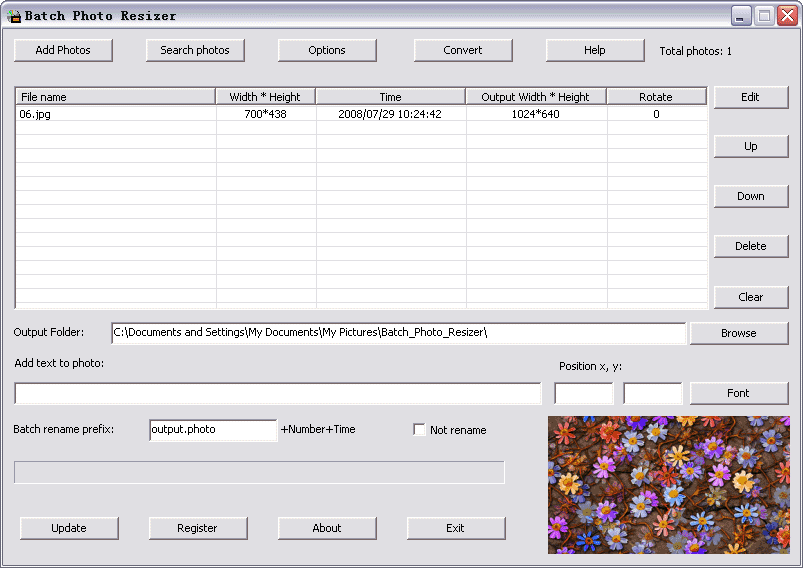
Step-by-step:
1. Click the ADD Photos button, select some images. The file name of the photo can be*.bmp, *.jpg, *.jpeg, *.gif, *.dib, *.png; *.ico, *.exif, *.wmf, or *.emf, *.tif.
Or you can click the Search Photos button, select a folder that include the images which you want to convert. Then the program will search images and add them to the list box automatically.
Or drag and drop images directly to the list box.
2. If needed, you can click the head of the list box volume File name or Time to sort the sequence automatically.
3. Click the Option button to set properties in Photo Output Options dialog box.
4. If you want to change one image output properties separately, select the item of the photo list box. Then Click the Edit button to set the output properties of the image. Or right-click the item.
5. Click the Brower button to set the output folder.
6. Add the text to the photos if needed. Then, enter the number in the position X,Y field. Click the font button to change the text font.
7. Change Batch rename prefix to customize the output image file name. For example, the default name is “output.photo”, the output file names will be output.photo.1.2003.03.31.jpg, output.photo.2.2003.03.31.jpg, output.photo.3.2003.03.31.jpg, output.photo.4.2003.03.31.jpg. Or you can check Not rename to keep the name original.
8. At last, click the Convert button to convert all the images.